How to use RIFF Box eMMC EFI/PIT/MBR/EBR Partitioning plugin
This plugin works with eMMC image files and phones which have following formatting:
1. Image Files or Phones with Standard Master Boot Record (MBR) and Extended Boot Record (EBR) formatting. Most of eMMC-bootable mobile phones have their eMMC memory formatted in such style. In this case partitions are accessed in standard way, by Partition ID: for example boot loader partitions or OS image partition (compare with qualcomm MIBIB partitioning: while ‘MIBIB’-type partitions have standalone partition descriptor block which contains info on all partitions and is posistioned in a definite NAND address, the eMMC partitioning is one MBR sector at fixed position + a chain of EBR sectors which are scattered throughout the eMMC address space in a literally random way);
2. Image Files or Phones which do not have standard Master Boot Record (MBR) and Extended Boot Record (EBR) formatting, but instead, partition information for such phones is taken from the PIT Table (some Samsung phones);
3. Image Files or Phones which do not have standard Master Boot Record (MBR) and Extended Boot Record (EBR) formatting, but instead, partition information for such phones is taken from the EFI Table (some Samsung, LG, Pantech and other phones).
Most of eMMC-bootable mobile phones have their eMMC memory formatted in such style. In this case partitions are accessed in standard way, by Partition ID:
For example boot loader partitions or OS image partition (compare with qualcomm MIBIB partitioning: while ‘MIBIB’-type partitions have standalone partition descriptor block which contains info on all partitions and is posistioned in a definite NAND address, the eMMC partitioning is one MBR sector at fixed position + a chain of EBR sectors which are scattered throughout the eMMC address space in a literally random way).
This plugin is a powerfull tool which enormously simplifies resurrection process (providing you have the required boot files from an official firmware or you have a ‘donor’ device) for those devices which are not yet supported by a dedicated resurrector DLL.
In this manual, we will explain basic functions of plugin, and how to use it to repair, unlock or do forensic investigation on supported phones.
This plugin supports following CPU/eMMC combinations:
- MSM7230, with eMMC as boot memory
- MSM8255, with eMMC as boot memory
- MSM8255T, with eMMC as boot memory
- MSM8655, with eMMC as boot memory
- MSM8655T, with eMMC as boot memory
- MSM8260, with eMMC as boot memory
- MSM8260A, with eMMC as boot memory
- MSM8660, with eMMC as boot memory
- MSM8660A, with eMMC as boot memory
- APQ8060, with eMMC as boot memory
- MSM7225A with eMMC as boot memory
- MSM7227A with eMMC as boot memory
- MSM7667A with eMMC as boot memory
- MSM8960 with eMMC as boot memory
- APQ8064 with eMMC as boot memory
- MSM8225 with eMMC as boot memory
- Samsung Exynos 4212 with eMMC as boot memory
- Samsung Exynos 4412 with eMMC as boot memory
- Samsung Exynos 3110 with eMMC as boot memory
- Samsung Exynos 4210 with eMMC as boot memory
To start the plugin, follow this procedure:
- Launch RIFF Box JTAG Manager
- Select desired Brand/Model DLL (Or corresponding one)
- Go to "Useful Plugins" TAB
- Select "eMMC Partition Table (MBR,EBR) Fullflash Image processing tool

- Click "Activate Plugin"

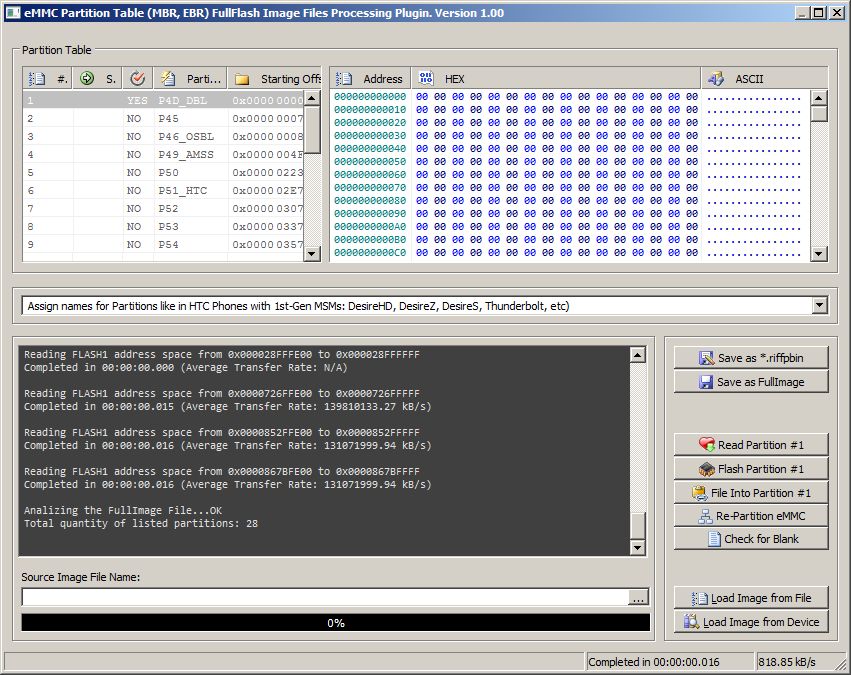
- Now You have plugin interface started. Select which type of Human Readable names for partitions You want to use:

- Load partitions structure
- Save partitioning structure to single file, to be used with blank chips
- Check for blank partitions
- Save all or single partitions into separate files
- Replace single partitions inside full or partial image and save as new file
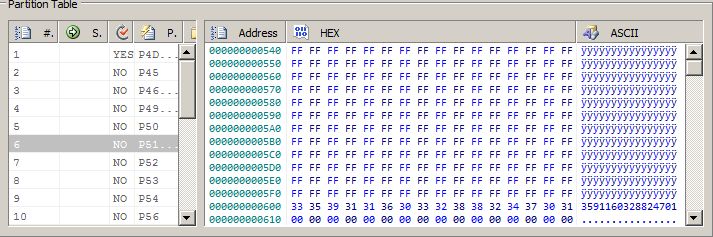
- Examine partitions content with integrated Hex Viewer
- Play smart with friends who don't own a RIFF Box

- Re-Partition new or erased eMMC on any device based on supported CPU-s platform
- Repair bricked or partially damaged any device based on supported CPU-s platform
- Write any partition(s) to any device based on supported CPU-s platform
- Open source file
- Click "Load Image from file"

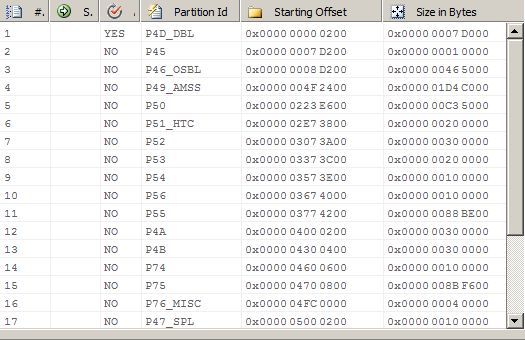
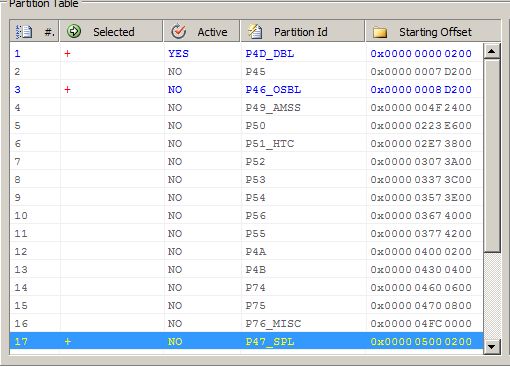
We have list of present partitions now, and we can see many information - partition names (if assigned) starting address, size, and if partition is active or no. Active partition is first boot partition in phone, and it's responsible for boot sequence. In this particular model, these are boot partitions:
- DBL (Initial Boot)
- OSBL (Radio Boot)
- SPL (HBOOT)
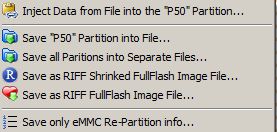
Select "Save only eMMC Re-partition info" . This will save "partition table", which can be used late for blank (erased or new) eMMC chips. Take note, only file saved from working fullflash image is valid.
If You select to save single all partitions, You'll need to enter prefix for file name(s). It will help You later, so You wont mix it with files from another model:

A file open dialog will popup where You can select source file. In this example, we will use HBOOT for HTC Desire S, from ROM.zip package:
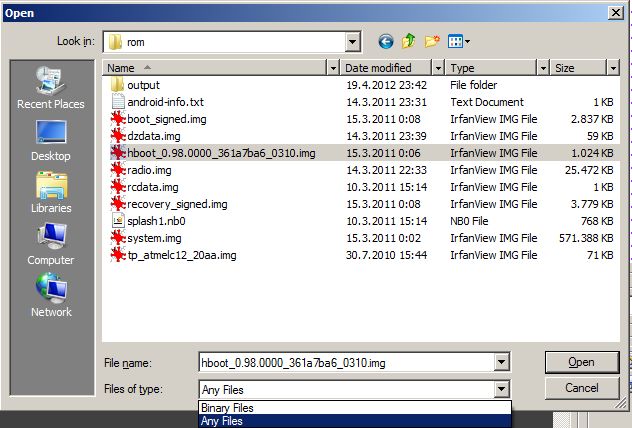
As You can see, You can use two file open filters.
How to Repartition new or erased eMMC on any device based on supported CPU-s platform:
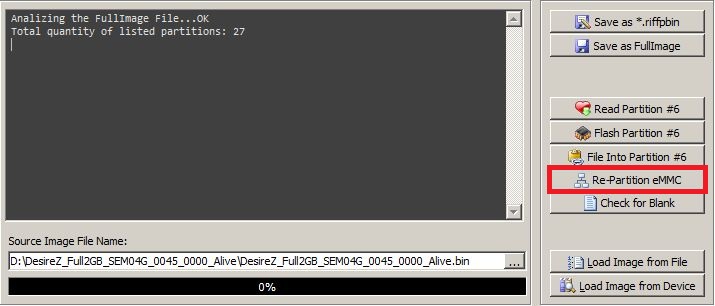
To Re-partition eMMC chip, load image from full flash, or fom previously saved partitioning file, and simply click "Re-Partition eMMC":
Boot partitions: (Required)
- DBL
- OSBL
- SPL (HBOOT)
- Recovery
- Boot
- HTC
- MISC
- WLAN
- SPLASH1
Boot partitions: (Required)
- DBL (SBL1)
- SBL2
- SBL3
- RPM
- TZ
- HBOOT
- Recovery
- Boot
- P5D (PGFS)
- ID
- WLAN
- P76_MISC
- HTC
- SPLASH1
- Load previously readed flash image
- Select partition(s)
- Click "Flash Selected"
- Read and save Partitioning info and structure (To be used later with blank eMMC)
- Read and examine single partitions from device in Hex Viewer
- Read and save single or all partitions from device to separate files
- Read all partitions and save it in compressed *.riffpbin format
- Read all partitions and save as full image
- Replace partition content with external file and write it to device
- Null erase single or all partitions in connected device
At this point an empty flash image will be created, filled with 00 00. Remember, this is just "placeholder" for actual flash content, and not a valid flash image.